
How to Level Ground for a Manufactured Home Foundation
Last Updated: November 15, 2026
Quick Summary
To level ground for a manufactured home foundation, clear the pad, grade it to the target elevation, fill low spots in thin compacted lifts, and verify with a laser level or transit. The pad should be level under the home while the surrounding site slopes away to shed water.
- Confirm local building department rules and soil requirements before grading begins.
- Remove stumps and roots, since buried organic material causes later settling.
- Place fill in thin lifts and compact each lift before adding the next.
- Keep the pad level and put the slope in the surrounding grade.
- Verify elevations across the pad with a laser level or transit and record readings.
Table of Contents
- Why Ground Leveling Matters Before Your Home Arrives
- Mobile Home Dirt Pad Requirements You Need to Know
- Manufactured Home Site Preparation: Clearing, Grading, and Drainage
- Step-by-Step: How to Level the Ground Yourself
- Stage 1: Survey and Stake the Pad
- Stage 2: Clear and Strip
- Stage 3: Rough Grade and Cut High Spots
- Stage 4: Place Fill in Thin Lifts
- Stage 5: Fine Grade to the Target Elevation
- Stage 6: Verify Elevations with a Laser Level or Transit
- Stage 7: Compact and Recheck
- Tools and Measurements You Will Need
- Checking Compaction and Soil Stability
- Leveling the Home Itself: Jacks Versus Water Level Methods
- Using a Water Level to Verify Your Foundation Is Level
- Booking Your Site Work: Call (888) 765-1776 Today
- Frequently Asked Questions
Why Ground Leveling Matters Before Your Home Arrives
Getting the ground right is the first step toward a manufactured home that stays solid for decades.
Learning how to level ground for a manufactured home foundation is less about making a lot look flat and more about building a stable base.
Our team is available 24/7 to answer questions about site preparation, customization options, and current pricing on our website.
Mobile Home Dirt Pad Requirements You Need to Know
A dirt pad is the prepared ground that supports your home’s foundation.
The U.S. Department of Housing and Urban Development (HUD) publishes guidance on foundations for manufactured homes.
Watch out: a level surface alone does not make a foundation suitable. Soil and code requirements still apply.
- Confirm the local building department’s rules before grading
- Check soil conditions where the home will sit
- Plan the pad size around the home’s footprint
In flood hazard areas, the home’s lowest floor may need to sit at or above the base flood elevation, which can change how high the finished pad must be.
Manufactured Home Site Preparation: Clearing, Grading, and Drainage
Site preparation is where most of the risk in a manufactured home project lives. Clearing, grading, drainage, and permits all interact, and getting the sequence right saves rework. Our team at (888) 765-1776 can help you plan the order of operations for your lot.
Clearing: What Comes Out and Why
Remove brush, trees, stumps, roots, and construction debris from the pad and a working margin around it. Organic material breaks down over time and leaves voids under the pad. Strip and stockpile topsoil separately if you plan to reuse it for landscaping. Grind or haul stumps rather than burying them, buried stumps are a common source of later settling.
Grading: Cut, Fill, and the Shape of the Site
Grading brings the pad to the target elevation and shapes the surrounding site so water moves away from the home. Keep the building pad level across the home’s footprint and put the slope in the surrounding grade, following local requirements and your installer’s specifications. Avoid a crowned or tilting pad; both create drainage and leveling problems later.
Drainage Design: Route Water Away, Not Under
Drainage is as important as level ground. Standing water softens soil and can undermine the pad. Plan the runoff path before you grade:
- Slope the surrounding grade away from the pad on all sides where the site allows.
- Route runoff to a swale, ditch, or storm drain, not toward a neighbor’s lot or a foundation.
- Keep downspouts and surface flow from discharging onto the pad.
U.S. Environmental Protection Agency guidance on stormwater and site drainage offers useful background on controlling runoff during construction.
Erosion Control During and After Construction
Bare soil moves. Install silt fence or straw wattles downslope of disturbed areas, keep stockpiles covered, and stabilize disturbed ground with seed, mulch, or gravel as soon as grading is done. Erosion control protects your drainage plan and keeps you on the right side of local stormwater rules.
Permits and the Sequence That Saves Rework
Before grading begins, confirm with the local building department what permits are required for site work, foundation, and utility connections. Ask whether a grading permit, erosion and sediment control plan, or soils report is required on your lot.
Watch out: grading before you confirm permit requirements or utility routes is one of the most common causes of stop-work orders and rework on manufactured home sites.
How HUD Standards and Local Codes Interact
The U.S. Department of Housing and Urban Development (HUD) publishes guidance on foundations for manufactured homes. Its guide notes that the foundation must suit the site’s soil conditions and comply with applicable codes.
Our team can help you plan these steps and connect you with the right questions to ask your local building department.
Step-by-Step: How to Level the Ground Yourself
Leveling a pad is a sequence, not a single afternoon of pushing dirt around. Work through these stages in order, and document each one, a written elevation log and dated photos will protect you if an inspector or installer questions the pad later. Our team at (888) 765-1776 can review your plan before you break ground, and we proudly serve local homeowners across the counties and cities we cover with custom manufactured and modular options.
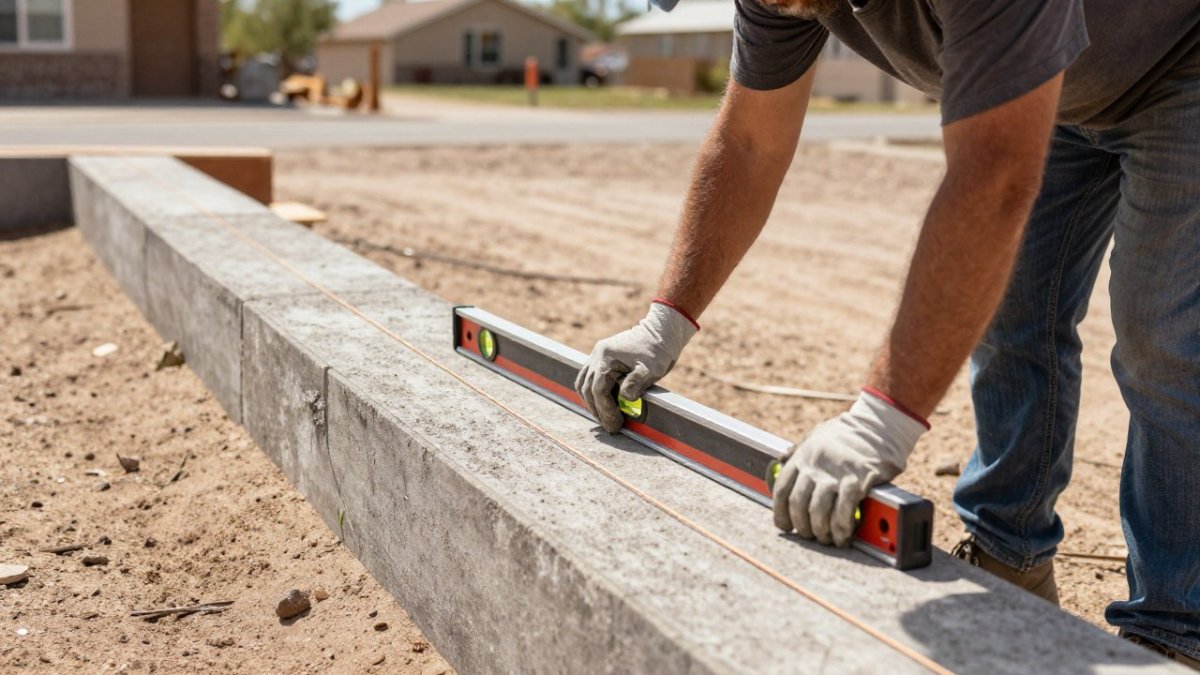
Stage 1: Survey and Stake the Pad
- Pull the site plan and confirm the home’s footprint, required pad size, and setback lines. Ask your installer for the required pad dimensions and any overage beyond the footprint.
- Establish a benchmark elevation, a fixed reference such as a survey stake or a mark on a permanent structure, and record it.
- Stake the four corners and run a string line between them. Check for square by measuring both diagonals; they should match.
- Mark the home’s footprint inside the pad with paint so the grader knows where the load-bearing area sits.
Stage 2: Clear and Strip
Remove brush, trees, stumps, roots, and debris from the pad and a working margin around it. Strip the organic-rich topsoil and stockpile it away from the pad if you plan to reuse it for landscaping.
Watch out: root balls and buried stumps are easy to miss and are a common cause of localized settling months after the home is set.
Stage 3: Rough Grade and Cut High Spots
Use a dozer or skid steer to cut high spots and move material to low areas. Rough grading should get you within a few inches of the target elevation; fine grading comes later. Keep the cut shallow and wide rather than digging a deep pit in one corner, which creates a fill problem elsewhere.
Stage 4: Place Fill in Thin Lifts
Fill low spots in thin lifts rather than dumping the full depth at once. Place fill in thin lifts and compact each lift before adding the next, following your installer’s and soils engineer’s specifications. Thick lifts trap air and leave soft zones that settle under the home’s weight. Use granular, free-draining material where native soil is poor; your installer or a soils engineer can advise on what is acceptable on your lot.
Stage 5: Fine Grade to the Target Elevation
Fine grading brings the surface to the planned elevation and shape. The pad itself should be level across the home’s footprint, while the surrounding site should slope away so water runs off rather than pooling underneath, as set by local requirements and installer specifications. Keep the building pad flat and put the slope in the surrounding grade, do not tilt the pad itself.
Stage 6: Verify Elevations with a Laser Level or Transit
Set up a laser level or transit on a stable tripod outside the work area and shoot elevations at a grid of points across the pad, corners, midpoints of each side, and the center at minimum. Record each reading against your benchmark. A string line and long level work for spot checks, but a laser or transit gives you a repeatable record you can hand to your installer.
Stage 7: Compact and Recheck
Compact the finished surface with a plate compactor or roller, then re-shoot your elevation grid. Compaction can move the surface slightly, so plan on a final pass of fine grading and rechecking after compaction. Repeat until the readings are consistent across the pad.
Tools and Measurements You Will Need
- A laser level or builder’s transit on a tripod for elevation readings
- A 4-foot or longer spirit level and a string line for spot checks
- Wooden stakes, marking paint, and a 100-foot tape
Ask your installer what tolerance they require across the pad before you start, since the installer’s requirement is what matters.
Checking Compaction and Soil Stability
A field check is to walk the surface in work boots and watch for soft spots or deep footprints.
Consider a geotechnical assessment when the site has fill soil, expansive clay, a high water table, or a history of settling.
If you want a second set of eyes on your plan before you grade, call our 24/7 team at (888) 765-1776 for guidance on site preparation, pricing matrices, and customization options. Why pay more when you can have quality, style, and affordability all in one?
The stages below run in order, and each one has a fixed check before you move on.
| Stage | What to do | Check or note |
|---|---|---|
| Survey and stake | Confirm footprint, set benchmark, stake corners | Diagonals should match |
| Clear and strip | Remove brush, stumps, roots, debris | Buried stumps cause later settling |
| Rough grade | Cut high spots, move material to low areas | Within a few inches of target |
| Place fill | Add fill in thin lifts, compact each lift | Follow installer and soils engineer specs |
| Fine grade | Bring surface to planned elevation and shape | Pad level; surrounding site slopes away |
| Verify elevations | Shoot grid with laser level or transit | Corners, side midpoints, and center at minimum |
| Compact and recheck | Compact surface, re-shoot elevation grid | Repeat until readings are consistent |
Leveling the Home Itself: Jacks Versus Water Level Methods
Once the pad is ready, the home itself must be set level on its supports.
Jacks lift each corner or section of the home so you can set the supports underneath.
A water level is a clear tube filled with water. It shows whether two points on the home are at the same height.
Using a Water Level to Verify Your Foundation Is Level
A water level is a reliable way to check whether your foundation is level. Fill the tube with clean water, keeping out air bubbles, then place one end at a reference point. Move the other end to each support point and compare the water height.
Work through these checks:
- Set the first reference point on a known height mark
- Read the water level at each support pier or block
- Note any difference and adjust the supports
Our team can walk you through this process. Call (888) 765-1776 if you want help interpreting your readings.
Booking Your Site Work: Call (888) 765-1776 Today
Ready to get started? Patriot Homes can help you plan your pad, choose a floor plan from our wide range of options (from 1-bedroom ADUs to spacious 4-bedroom models), and understand the site work involved.
Call our 24/7 team at (888) 765-1776 for pricing matrices, customization options, or immediate assistance. You can also request a quote from our website.
Frequently Asked Questions
How do you level ground for a manufactured home foundation?
Start by clearing vegetation, debris, and topsoil from the pad area, then grade the site with fill and compact it in layers until the surface is flat within a tolerance your installer or foundation design specifies. Check the pad with a long level, a string line, or a water level across its full length and width. Confirm that drainage carries water away from the home location. Because grading alone does not make a foundation suitable, have the finished pad reviewed against your home’s installation instructions and local requirements before the home is set. Patriot Homes can help you plan your site. Call (888) 765-1776 or request a quote on our website.
How high should a mobile home be off the ground?
The required clearance depends on the foundation system, the home’s design, and local requirements, including flood-hazard rules. The HUD guidance on foundations for manufactured homes is a useful reference on flood hazard requirements; check it for current details. Your installer will set the final height based on the manufacturer’s installation instructions and the approved foundation plan. For a specific recommendation for your property, call Patriot Homes at (888) 765-1776.
Can I level the ground for a manufactured home myself?
Many owners do the basic clearing and rough grading themselves, but a pad that will support a manufactured home must be compacted, drained, and verified carefully. Errors in compaction or drainage can cause settling that later affects the home’s level and doors. Many owners hire a licensed contractor or excavator for final grading and compaction, and a qualified installer for setting the home. Our team is available 24/7 at (888) 765-1776 to walk you through your options.
Can you level a manufactured home with jacks?
Yes. Jacks and shims are commonly used to set a home on its piers or footings so the frame is level. Leveling the home is a separate step from preparing the ground: a level home on an unprepared or unstable pad will settle again. Work with a qualified installer who follows the manufacturer’s instructions, and check the home with a water level after setting. For help choosing the right setup for your floor plan, call (888) 765-1776.
